
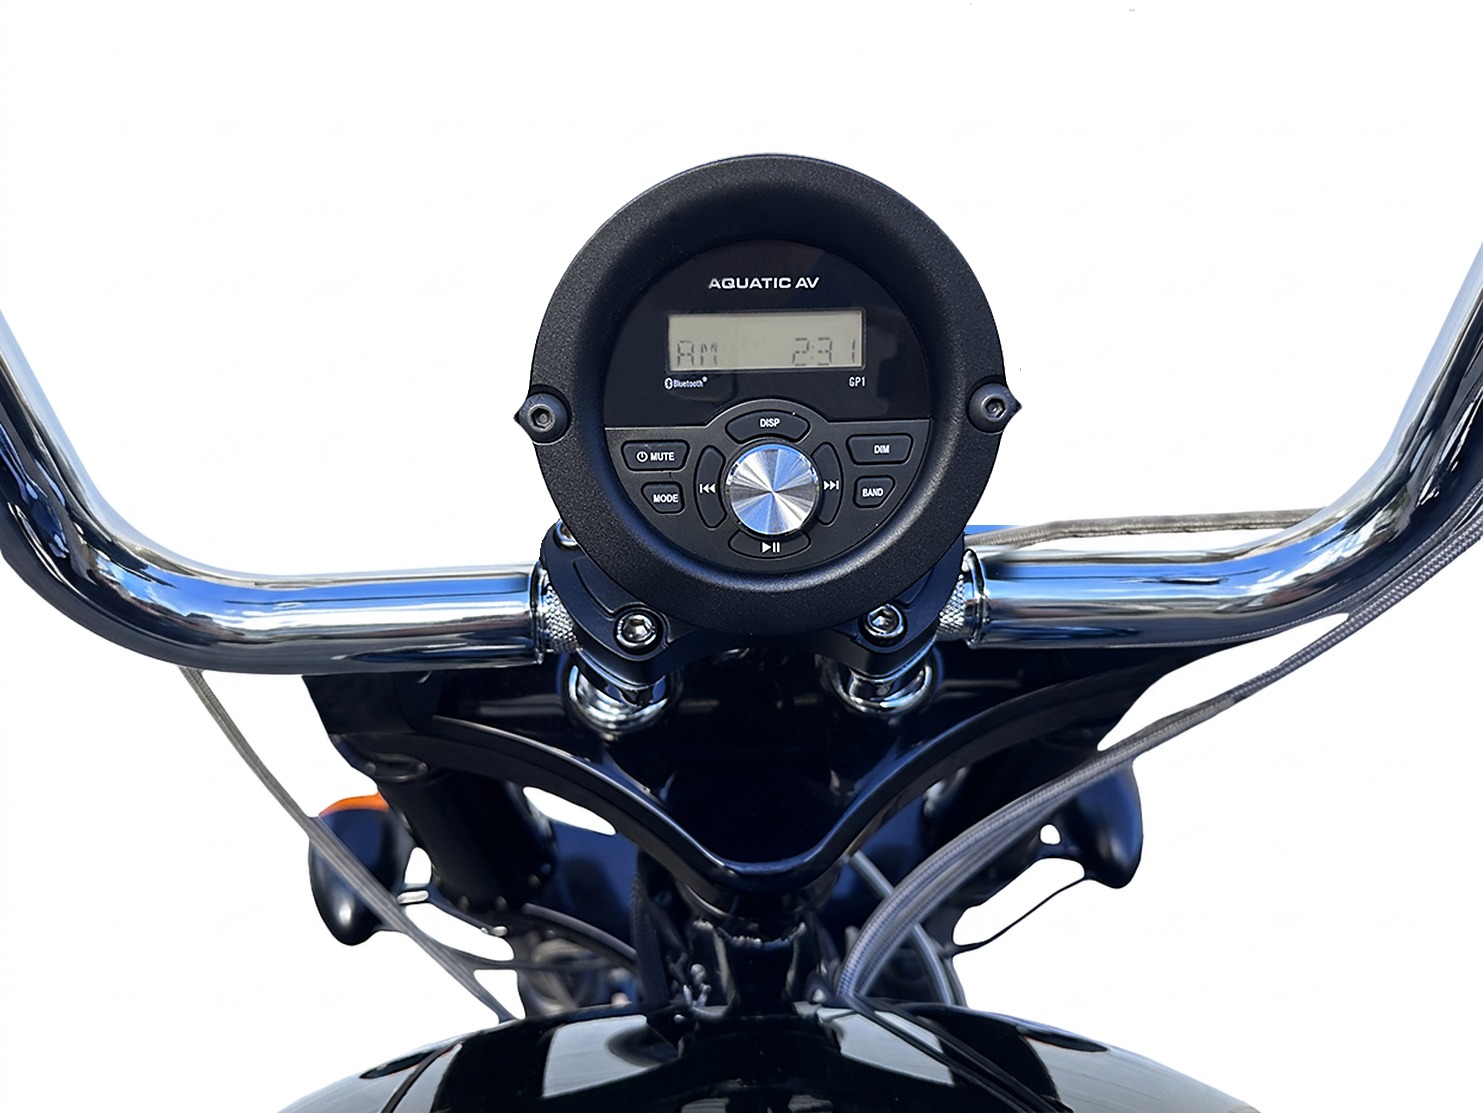
Installing the GP1 gauge stereo on your Softail is straightforward. However, you will be replacing the handlebar clamp. Once the original clamp is removed, the handlebars will no longer be supported.
Support Your Bars
Before removing the stock clamp:
- Place the motorcycle securely on its stand, or preferably supported solidly by a motorcycle jack.
- Place a blanket over your tank to protect it.
- Turn the bars straight ahead. Have a helper support the handlebars to prevent them from falling or rotating unexpectedly. Falling bars can damage the tank, controls, and surrounding components.
Taking a few moments to secure the bars will make the installation easier and help prevent accidental damage.
Check and Mark your Pullback
You are used to the pullback on your bars, so take a sharpie, and just mark a line at the bottom of the bar and the handlebar riser. If you have black components, use a piece of masking tape. There’s nothing worse than getting back on your bike and having it feel “off”.
Taking a few moments to record the original position will help ensure the bars go back exactly where you like them.
Check Existing Torque
Check the actual torque on your handlebar clamp before removing it.
Factory torque specifications are based on factory components. Motorcycles equipped with aftermarket handlebars or risers may require different torque values specified by the component manufacturer.
Using a torque wrench, set the wrench to 15 ft-lb and attempt to tighten each clamp fastener. Gradually increase the setting until the fastener just begins to move, and record the value.
This "breakaway" torque value may be slightly higher than the original installation torque due to the presence of thread locker, corrosion, or other factors. Nevertheless, returning the fasteners to approximately the same torque value during reassembly helps preserve the existing handlebar setup, whether your motorcycle has factory or aftermarket components.
Replacing the Handlebar Clamp
With a helper holding the handlebars steady so they do not move, remove the factory handlebar clamp hardware and lift away the original clamp.
Carefully position the Havoc GP1 clamp assembly in its place.
Apply medium-strength threadlocker (Loctite® 242 or 243 Blue) to each fastener and reinstall the original mounting hardware. Tighten the fasteners gradually and evenly so the gap between the clamp and riser remains uniform front to back.
Re-torque the fasteners to the value determined earlier.
NOTE: Proper torque is essential. Excessive tightening can damage components, while insufficient torque may allow the handlebars to move. Our billet clamp is very strong and you are unlikely to damage it. But the threads in your risers may have seen years of service and repeated adjustments. Use care, tighten the fasteners evenly, and confirm that the handlebars are secure before riding. You do not want the bars moving while riding.
CRITICAL SAFETY CHECK: Shake the bars back and forth to ensure they are tight.
WARNING: Failure to ensure the bars are tight can lead to a loss of control. If it moves, torque it. There should be absolutely no movement between the handlebars and the risers.
Wire Routing
To keep the install clean and prevent interference with the bike's throttle cables on the right, the wiring can routed as follows:
- The "Clean" Route: Feed it under the fuel tank for a completely hidden look.
- The "Easy" Route: Run it along the outer frame rai on the left side, just under the fuel tank. If you choose this, use black zip ties every 4–6 inches to keep it tight and professional.
- Tip: Ensure the harness stays clear of the engine's cooling fins.
- GP1 Power Harness: Feed the lead from your head unit down the left side along the frame underneath the tank. Use the supplied cable ties to secure it.
- Speaker Leads: if your stereo kit has the 3.5” Handlebar Speaker Pods, you can route the speaker leads along the same path as the power harness – unless you will be installing the speakers high up your ape-hangers, in which case you may need the additional wire. If you are not using the handlebar speakers at this time, you can safely cable tie these leads to the power harness.
- AM/FM Antenna: Plug in the supplied hidden antenna and route it along that same path (AM/FM antennas do not require a clear view to the sky).
- RCAs: If your system uses an amplifier, you can cut off the plastic protective caps from the RCA ends and secure the connection to the head unit with a wrap of electrical tape. This prevents them from vibrating loose.
- USB Port: If you plan to use the USB for phone charging or media, route the plug to the handlebars for easy access.
Hiding the Cables
It’s easier to hide wires on a Heritage or Fat Boy with nacelle/fork tins than on a naked Standard. Use your best judgement, depending on your model. We included a length of black expandable fiberglass sheathing so you can hide the wires coming out of the back of the unit, which you can secure with cable ties or electrical tape.
CRITICAL SAFETY CHECK (The "Swing Test")
Before you tighten everything down and move to the next step, you must perform a clearance check:
- Check the Steering: Slowly turn the handlebars all the way to the Left Stop, then all the way to the Right Stop.
- Verify: Ensure no wires are being stretched tight, "tugged" out of the head unit, or pinched against the frame or fork stops.
- WARNING: Failure to ensure full, unobstructed movement of the handlebars can lead to a loss of control. If it pulls, re-route it.
Powering the Head Unit
The Power Harness features a dedicated on-off toggle switch with 3M tape to prevent parasitic draw during storage.
- The Purpose: The GP1 pulls a tiny amount of "memory" current even when off. If the bike sits for more than a few days, flip this switch to OFF to save your battery.
- The "No-Tape" Rule: Do NOT rely on the 3M tape on the switch to support the weight of the wiring harness. Use zip ties on both sides of the switch to hard-mount the wires to the frame. The 3M tape is only to keep the switch face from spinning or rattling. Placement: Stick it somewhere accessible but hidden — usually on the side of the frame, where the tank and seat meet.
Connecting to the Battery
Locate your battery terminals.
- Positive (+): This is the lead with the Yellow and Red wires and the toggle switch.
- Connect this to the Positive (+) battery post.
- Negative (-): This is the Black wire. Connect this to the Negative (-) battery post. Safety Note: Always connect Positive first, then Negative, to avoid accidental sparks against the frame.
Before you zip-tie the final slack and put the seat back on:
- Ensure the new toggle switch to the ON position – the GP1 screen will display the time.
- Press the power button on the GP1 faceplate.
- Verification: The screen should light up!
Final Connection Check
Once you've confirmed power, go back and "clip the tails" off all your zip ties. Make sure the battery bolts are snug—vibration is the #1 cause of "ghost" power issues.
System Operation & Settings
Refer to the included Aquatic AV GP1 User Manual for all specific operating instructions. The manual is your go-to guide for:
- Bluetooth Pairing: Connecting your phone for wireless music.
- AM/FM Presets: Saving your favorite local stations.
- USB Media: Navigating folders if you're using a thumb drive.
Pro-Tip: Keep the Aquatic AV manual in your saddlebag. If you ever need to reset the unit or tweak a setting on a long road trip, you’ll be glad you have it.
CRITICAL: Please, do Not Adjust the EQ Settings
Your GP1 has been professionally pre-tuned for maximum performance and safety.
- The Calibration: The internal crossover and Frequency settings have been locked in to ensure your speakers can hit 100+ dB clearly without distortion.
- The Risk: Changing the digital EQ (Bass/Treble/Loudness) inside the Aquatic AV menu can override these safety limits. Pushing the "Bass" or "Loud" settings at high volumes will cause clipping and can lead to permanent speaker failure.
- The Rule: Leave the EQ at "FLAT" or "OFF." If you want more punch, simply turn up the volume—the system is already optimized to give you the best possible sound for the open road.
Parts Included:
- GP1-ST with Parallel or Offset Handlebar Clamp (in chrome or black)
- GP1-ST Power Harness
- AM/FM Hidden Antenna