
"Do I need a tube?" is one of the simplest questions about a new wheel, and the answer depends on the wheel, the tire and, sometimes, the size.
Billet aluminum wheels
All machined billet aluminum wheels are tubeless. The rim is a single solid piece with no spoke holes, and the tire bead seals directly against the machined rim. Most motorcycle tires are also designed for tubeless use.
Check the tire's sidewall for its type marking: TL means tubeless, TT means tube type, and some tires are marked for both. If a tire is specified for tubeless use, it can be mounted on a billet wheel without a tube. When we mount tires on billet wheels, we mount them tubeless.
Sealed spoke wheels
Traditional spoke wheels are tube-type: every spoke passes through the rim, and every spoke hole is a potential leak. Some modern spoke wheels, including our Fat Spoke wheels, are designed for tubeless use. The air seal is provided by a vulcanized rubber rim strip bonded around the inside of the rim, covering and sealing the spoke nipples. When we mount tires on these wheels, we do not use a tube.
In most cases, the rim strip seals completely and permanently. But a rim strip is a potential point of failure and sometimes they can leak air. For that reason:
- Check tire pressure before every ride on any sealed spoke wheel. This is good practice on any motorcycle, and it matters more here.
- If you notice any loss of pressure, it is a sound precaution to fit a tube inside the tire — provided the tire is rated for tube use (a TL/TT tire).
A tube in a tubeless-rated spoke wheel is not a downgrade; it is simply a second line of defense.
26-inch front wheels
On 26-inch front wheels, we recommend a tube. We have found that 26-inch tires perform better and hold air much better with a tube installed. When we mount a 26-inch tire for a customer, we use a tube.
Internal balancing beads
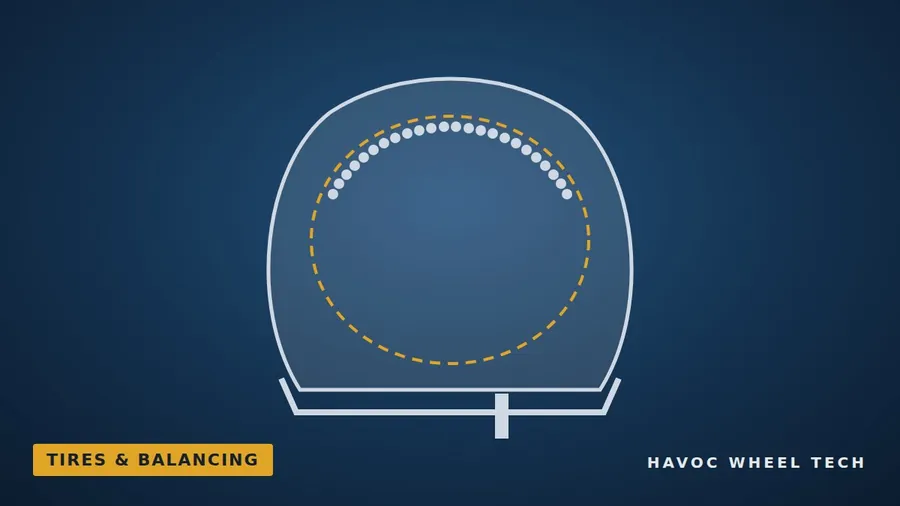
Customers sometimes look at a newly mounted wheel, see no wheel weights, and assume it has not been balanced. It has. We balance with an internal balancing bead system: a measured quantity of fine ceramic beads is placed inside the tire. As the wheel rotates, centrifugal force distributes the beads around the inside of the tread, where they settle opposite any heavy spot and balance the assembly dynamically.
Internal balancing has three advantages on a custom wheel:
- No external weights to spoil the appearance of a billet or chrome wheel, and no adhesive to damage the finish.
- Continuous balancing. The beads re-distribute as the tire wears, so the wheel stays in balance over the life of the tire.
- Compatibility with tubeless tires, tubes and tire pressure sensors, when the beads are designed for it.
When it comes time to replace a tire, tell your tire shop the wheel is bead-balanced, so they can collect or replace the beads.
Beads or weights?
Both methods work, and both are widely used. They simply balance the wheel in different ways.
Wheel weights are fitted on a balancing machine, which finds the heavy spot and tells the technician how much weight to add and where. The result is precise and easy to check, and any tire shop can do it. On a custom wheel, though, the weights are on show, stick-on weights rely on adhesive against a polished or chrome finish, and the balance is set for the tire as it was on the day it was mounted.
Balancing beads go inside the tire and do their work on the road, redistributing as the wheel turns and as the tire wears. There is nothing on the outside of the wheel, and nothing to fall off. For them to work well:
- Use the right quantity for the tire size, as specified by the bead manufacturer.
- Keep them dry. Moisture makes beads clump. Mount the tire dry, and inflate with dry air.
- Use a bead-compatible valve core, or one with a filter, so a bead cannot hold a valve open when the tire is checked or inflated.
Whichever you choose, balancing corrects weight, not shape. A wheel or tire that is out of round, or a tire that is not seated evenly on the rim, will vibrate however well it is balanced. Check that the molding line just above the rim sits an even distance from the rim all the way around on both sides, and see Runout Tolerances: Why Thousandths Matter.
Getting tires mounted without marking the wheel
A tire change should never leave a mark on a billet or chrome wheel, and with the right equipment and a little care it won't. Most damage comes from a machine or a tool set up for steel car rims or plain black motorcycle wheels. When you take a custom wheel to a tire shop:
- Tell them what it is. A billet or chrome custom wheel should be handled differently from a stock painted one. Ask whether they mount tires on custom motorcycle wheels regularly.
- Protective jaws and heads. The clamps that hold the wheel should have plastic or rubber jaw protectors, and the mounting head and bead breaker should be plastic or covered, so no bare metal touches the rim.
- Rim protectors on any hand tool. If tire irons are used, they need plastic rim protectors under them, and they should never be levered against a spoke or the face of the wheel.
- Plenty of tire lubricant. A well-lubricated bead slides over the rim instead of dragging across it.
- Care around the valve and TPMS sensor. Start breaking the bead away from the valve stem, so the bead does not crush a TPMS sensor or its bracket.
- The right machine for wide tires. Very wide rear tires need a machine designed for them. Forcing a wide tire on a standard machine is how rims get gouged.
- Rotors and pulley. If the machine would clamp or press against a rotor or the pulley, they come off first, and go back on with new hardware, the correct threadlocker and the correct torque (see Harley Wheel Fastener Guide).
- Bead seating pressure. Seat the beads within the maximum pressure shown on the tire sidewall, then set the running pressure.
If you buy your wheels and tires from us, we can mount and balance the tires for you, and they arrive ready to install.
TPMS on spoke wheels
Many late-model Harley-Davidson motorcycles use a tire pressure monitoring system (TPMS), with a sensor inside each wheel. On a stock wheel, the sensor is typically attached at the valve stem. On a sealed spoke wheel, the inside of the rim is occupied by the rim strip, and the valve stem is a different size, so the sensor needs a secure mounting point. For our Fat Spoke wheels, we supply a TPMS relocation bracket that mounts the sensor to the valve stem assembly. The installation goes like this:
- Fit the relocation bracket using the supplied hardware.
- Remove the valve stem, taking care not to disturb the tapered gasket inside the wheel. That gasket is pressed into the vulcanized rim strip and forms part of the air seal.
- Slide the valve stem through the TPMS bracket, then through the tapered gasket and out through the wheel.
- On the outside of the wheel, fit the flat gasket, then the metal washer, the nut and the locknut. Tighten the nut only until the gaskets are snug and the bracket is secure. Do not overtighten: a crushed gasket may no longer seal. Once the nut is set, tighten the locknut against it.
- Check the valve stem length. A longer valve stem is included. If you are not satisfied that the valve cap seats properly, remove the stem and fit the longer one, following the same steps.
- Remove the TPMS sensor from your stock wheel.
- Mount the sensor to the relocation bracket with the supplied flange nut and spacer, aligned and centered on the bracket.
- Torque the nylon-insert nut to 30 in-lb — inch-pounds, not foot-pounds. It is a light torque on a small fastener.
- Mount the tire, inflate to the recommended pressure and confirm the TPMS reads correctly on the motorcycle.
With the sensor on the bracket, the wheel can still be balanced with internal balancing beads fed through the valve stem in the normal way. Beads designed for TPMS use are compatible with the sensors, and they avoid unsightly weights on the outside of your new wheels.